UPDATE: Since originally writing this post there has been a lot of clarification. Kaylee Ellen purchased the plant from the Aroid show and Enid was looking after it for her until she got back to the states to transport it. It was confirmed that the false bids were entirely due to people trolling the auction, i.e. making fake accounts and driving the price up to ridiculous amounts.
So, I’m assuming some people have been following the auction today of the Variegated Gloriosum. From what started as a usual auction quickly became one of the most ridiculous plant auctions ever.
@NSEtropicals
It started as a regular auction with no reserve price. It’s a very rare plant that literally no one has, so I was not surprised to see it quickly hit 15k two days before the auction even ended. But then things started getting weird…The price flew up to 200k in an instant, and then back down to 40k. So I assumed it was just trolls bidding. Then the price raised back up to well over $340,000. What the heck is going on?
So far the listing has been taken down, over a day before the auction was scheduled to end. I have yet to see any statement about it either. But people are quick to talk about it on Facebook.
Bids from the NSE website
Some are claiming that the entire auction was a publicity stunt. Others are claiming that the plant is a tissue culture and shouldn’t even be going for this much. While others are wondering where this mysterious plant even came from.
It certainly wouldn’t be the first time trolls ruined an auction. But this price point is crazy.
Bids from the NSE website
It’s no secret that the plant came from the Youtuber Kaylee Ellen, and is now in the watchful hands of Enid over at NSE Tropicals. The auction was advertised as such. So why are people so curious about where Kaylee got it from?
Bids from the NSE website
So is the plant that rare? I definitely haven’t seen them in many personal collections. I haven’t seen any at all. But then again, there are apparently secretive private collections that we just don’t know about. Or at least, that’s what people on Instagram are saying.
When I first started collecting plants, I certainly was not thinking of all of the maintenance tasks I’d have to start doing. The biggest and scariest one for me was fertilizing.
There are just so many fertilizing options out there. Not only that, but there are soil conditioners, foliar sprays, root hormones, and pretty much every chemical you can think of to stimulate growth. So which one was I supposed to use and how often?
If you’ve looked at fertilizer, you’ve probably seen the letters NPK. NPK stands for Nitrogen (N), Phosphorus (P), and Potassium (K). So what do these things do? Nitrogen helps the leaves of a plant grow and is responsible for making plants greener. Phosphorus helps root growth, flowering, and fruiting. And Potassium helps with the overall health of the plant, helping prevent disease and strengthening the durability of the plant.
Your plants crave Carbon, Hydrogen, Oxygen, Nitrogen, Phosphorus, and Potassium. These last three come from the soil, so the health of your potting mix is vital for the health of your plants. Different fertilizers offer varying ratios of these nutrients. And you are going to need a different percentage depending on what you are growing.
For this blog, we are going to focus on houseplants. You’ve probably seen advertisements for soil conditioners like Superthrive, Liquidirt, and Noot. These are actually soil vitamin supplements and not fertilizers.
Soil conditioners alone are insufficient for a complete fertilizing regimen. That’s not to say that these products aren’t great. For reviving stressed plants or rooting cuttings, they can be awesome. But for a complete food source for your plants, they are just not enough.
For my personal collection and for the plants that I grow for sale, I use a mixture of long-term release fertilizer, fish fertilizer, and worm castings in my potting mix.
For a long-term release fertilizer, I use Tezula’s Nutricote time-release fertilizer. I like this option because it is something that is always in the soil of my plants. Every time you water, a little bit of the nutrients dissolves into the soil—an excellent option for those of us that tend to forget to fertilize regularly.
During the growing season, I supplement the long-term-release granules with fish fertilizer. I use Neptune’s Harvest Organic Fish Fertilizer. Be warned that it can be a bit stinky if you apply it inside, but it is SO WORTH IT. My plants absolutely love it, and it comes with easy directions to follow.
In my potting mix, I use a mixture of worm castings to build my soil. I like the Wiggle Worm brand. For those that don’t know, worm castings is worm poop! I highly recommend adding some to your potting mix whenever you repot a houseplant.
Here is my fertilizer routine: I use fish fertilizer every two weeks. Each of my plants is topped with the nutricote slow release fertilizer, and my potting mix includes worm castings.
I would recommend figuring out a regimen that works for you and sticking to it. One of the most important parts about growing plants is soil health. Finding the right balance between overfeeding and underfeeding is key!
Feel free to reach out with any questions. We love getting your plant questions.
If you are looking to start a greenhouse on your property, you’ve come to the right place! I’ll go over how we set up the greenhouses on our property and explain areas where we failed and others where we succeeded. A greenhouse is a fantastic investment for any gardener looking to expand their growing. And it turns out you don’t have to be a professional builder to get one started in your backyard.
We have two greenhouses on my property. One of them is a great kit you can get online from a company called Palram. We decided to go with Palram because they had the best reviews, and it looked like their product could hold a decent snow load. Since we live in New Jersey, it was essential for us to look for something that could handle our weather. Unfortunately, I’ve seen too many horror stories of greenhouses collapsing under the weight of snow!
The Palram kits require a bit of finagling; they are certainly not the easiest to put together. Imagine Ikea furniture but with half the directions missing. However, as long as you have some patience and willpower, it is possible to put it together.
They do need some foundation, though. So we decided to use large 4×4 pieces of lumber to create the stable foundation for our greenhouse. Unfortunately, pouring concrete entails a permanent structure, which would require getting specific permits and other hassles. Plus, who wants to pour concrete? So we went with a much simpler foundation by using lumber.
I highly recommend getting one of the kits with windows that open. Greenhouses get REALLY HOT, and maintaining air circulation and temperature in the summer months will be a problem. So every little ventilation option will help you down the road.
I also recommend getting and installing shade cloth in your greenhouse. Direct sunlight will most likely burn your plants, especially if you are growing tropical houseplants out there! Shade cloth will also help with regulating the temperature. We do not heat or cool this greenhouse, and we currently use it for our non-tropical bonsai.
Our other greenhouse on our property is a high tunnel or hoop house structure. We found someone looking to sell their entire 60-foot high tunnel on Facebook marketplace, so naturally, we jumped on that opportunity. We disassembled and transported the whole thing onto our property but only ended up using 40 feet of it.
Hoop houses are primarily made from steel hoops that are staked into the ground and repeating intervals. The hoops are then connected with a structural pole that runs down the entire top of the structure. Then you lay plastic on top of the whole structure and enclose it.
We decided to go with 6-millimeter plastic and double-layer it. When you double-layer it, you can run an insulation fan between the two sheets of plastic. Again, adding insulation in a greenhouse is excellent wherever you can because these things heat up fast in the summer and cool down fast in the winter.
Although initially, we were going to try an oil tank heating system for our hoop house, that was just a bit out of our comfort zone. Maybe it was the spilling of oil on our property on the first night or the challenge of moving a giant oil tank by ourselves, but we ended up deciding against it and going for natural gas.
At first, we ran the gas line ourselves, and we were super proud of it. I mean, what a triumphant feat for someone who knows nothing about gas lines! Well, it turns out we should have hired a professional because we ran the incorrect tube size. So after redoing it with an actual gas company, we finally had gas installed and a heater running. Unfortunately, it took us much longer than expected, so we had our heater up and running just in time for summer!
Now we are currently troubleshooting the summer heat in the greenhouse. We recently installed an evaporative cooling system that seems to be working awesomely so far. We also have a large exhaust fan to push hot air out of the greenhouse. And of course, lots and lots of shade cloth.
So whether you are looking to start with a greenhouse kit or go full throttle with a total DIY hoop house with heating and cooling, I hope this blog gives you the confidence to get started! It is definitely a project to feel proud of.
It’s no secret that plants can do wonders for mental health. Whether it’s the act of caretaking, the return to nature, or the escape from modern day stresses, taking care of plants makes us feel good. I thought it would be fun to delve into some of the reasons why plants can be so beneficial to mental health.
Let’s start with the act of caretaking. Taking care of something can make us feel fulfilled. Watching something thrive can make us feel satisfied. Feeling fulfilled and satisfied lays the foundation for positive mental health. Sometimes, just the act of taking care of a plant can tip the scales of feeling worthless to feeling useful.
Being the reason that something is successful not only makes us feel good but helps us with our own success. We may not always feel self-worthy and proud, but we can look at our small accomplishments and feel good about ourselves. It really can be a model for how we live if we let it. A little bit of sunlight, some water, and the right conditions is what a plant needs to thrive. Similarly, we as people need simple constants and conditions to be healthy.
Nature makes us feel good. Whether it’s the feeling of sunshine on our skin, the sound of running water, or the presence of wildlife, being outdoors helps us feel better. I know that for me, the lockdown for COVID-19 was a wakeup call. Being isolated and stuck indoors did not feel good. I was able to realize how important it was for me to spend time outdoors. And how much better it made me feel when I took the time to do it.
Bringing a little piece of nature indoors with a houseplant can be so beneficial to the atmosphere of your space. For example, when our living space is full of clutter, it often reflects our mental state. I know that when my kitchen counter is messy I simply can’t focus. It just doesn’t feel comfortable. Likewise, putting plants in our living space can make us feel happy. It can create a moment of escape from our daily lives, or our jobs, and promote a return to nature.
Sometimes we get so busy and focused with our jobs or daily chores that we simply forget to look up. There might be laundry to do, sheets to change, dinner to prepare, or just long days at work, navigating coworker relationships, and trying to make enough money to live comfortably. Whatever it is, it’s always nice to have a break. Plants can offer that escape.
Taking time to water, inspect new growth, treat for pests, repot, prune or even just taking a moment to look at your plants gives your mind a break. It’s these moments from daily stresses that’s so important to your overall well-being. I know for me, that if I didn’t let myself take breaks I wouldn’t feel as accomplished about my day. It’s these little moments that houseplants create that are so beneficial to mental health.
So whatever is going on emotionally in my life, I can always turn to my gardening hobby for a moment of peace. That’s not to say that it’s all sunshine and daisies. I’ve had my fair share of plant losses, pest infestations, and other stresses that are created by having plants. Not to mention things that actually happen in my day to day life that are anything but plant related. But getting through these and creating small victories only helps me with everything else going on with my world.
Today, I’m going to try to let myself take a moment and appreciate why I have plants and what they do for me. Tomorrow, if I see a spider mite or torn leaf I’ll probably freak out about it. But that’s okay too.
Whether you are an advanced or beginner house plant collector, you will inevitably experience pests. My first big pest scare was with mealybugs on a big and lush monstera adansonii. I noticed these white fuzzy specs everywhere, and naturally, freaked out when I realized they were bugs. At the time, I didn’t take any pest precautions with my plants, and unfortunately, the plant was infested beyond repair.
This Houseplant Pest Guide will introduce you classic warning signs for a pest infestation. You will also find some favorite tricks and tips for regular bug maintenance at the end of this guide. I’ve found that regularly inspecting my plants is the best way to know what is going on with them. It sounds easy at first, but as your collection grows and life gets busy as usual, it gets harder and harder to stay on top of each leaf in your collection! Now, let’s get an idea of what bugs to look out for.
Photo by Gilles San Martin
Scale
Scale is a super sneaky pest because it looks so much like dirt or regular foliage stains. When checking your plant for scale, check where the leaf meets the stem. If you see little brown stain-like specs, or if your plant looks sticky or moldy, it’s time to check for scale.
Luckily, scale are immobile bugs and lock themselves into place on your plant. So this type of pest infestation isn’t likely to spread to all of the plants in your collection. Regardless, it’s important to quarantine the infested plant – make sure it’s leaves are not in contact with anyone else!
To treat for scale, start by simply picking them off your plant. Their hard outer shell keeps them protective, so simply removing them is the best way to go. You can also wet a Q-tip with rubbing alcohol and dab them individually.
If you’d like to use a spray, I recommend insecticidal soap. Once you spray down the plant, the scale can be easily wiped off. Insecticidal soap is something every plant collector should have in their arsenal. I personally like the products by Garden Safe, Bonide, and Natria. You can also mix your own insecticidal soap at home with water and a bit of dish soap!
Photo from DepsoitPhotos
Aphids
Aphids love spending their time sucking the delicious sap out of the foliage of your plants. All of this “drinking” can cause leaf discoloration and stunted growth. If your leaves have random patches of yellow on them, then it may be time to check for aphids.
The first step is to treating aphids is to get them off your plant! Use a cloth and wipe them off; they should come off quite easily. Then you want to start with insecticidal soap and completely wet the foliage. It’s likely that you will need to repeat this soap treatment, so check the plant regularly. Within a few treatments, the Aphids should be gone.
Mealybugs are some of the easier pests to spot. They are white, fuzzy, and like to hide out under the leaves. They are often found grouped together, so if you see a cottony object on your leaves, it’s likely mealybugs.
Like scale, mealybugs can be spot treated with rubbing alcohol and a q-tip. You can also try wiping them off with a moist paper towel. Insecticidal soap is always a good place to start. After the initial treatment, wipe the leaves down weekly with neem oil. Neem oil is a great natural pest preventative and also a fantastic way to keep your foliage clean!
Make sure to check any nearby plants for mealybugs, as they like to move. When you find a mealybug infestation, it’s best to treat all of the nearby plants.
If you see little webs on your plants, then it’s time to introduce yourself to the spider mite. Spider mites like to pierce the leaves and drink the juices, leaving little marks behind. Another telltale sign is speckled or dotted foliage. They are quite hard to see with the naked eye, so these guys require careful inspection.
Insecticidal soap and neem oil are always my first steps when I spot spider mites. I also make sure to wipe the leaves down completely, getting rid of any webbing or visible bugs. If you are vigilant and repeat these steps, you will be able to get rid of them.
Spider mites are notoriously hard to get rid of on the first try. So make sure to check your plant frequently and be prepared for repeat treatments.
Fungus gnats are more annoying than anything else, and they are probably the most common houseplant pest. If you have plants that enjoy moist soil, you’ve probably experienced fungus gnats. Fungus gnats are usually found hanging around the soil of your plants. If you suddenly have little flies all around your plants, it’s time to treat for fungus gnats.
Fungicide spray (link) is a great way to manage a fungus gnat infestation. I like the one made by Garden Safe. Spraying the top of our soil weekly will do wonders. Another great way to manage an infestation is to put little saucers of apple cider vinegar around your plants. The gnats will be attracted to the sweet liquid rather than your plants, and so it’s an excellent way to catch quite a few without much labor. Another easy way to catch a lot of fungus gnats is to use sticky traps. On Amazon, you can find options for yellow plant sticky traps, even some in cute shapes!
Photo: Matthew Bertone
Thrips
It’s safe to say that thrips are just the worst. Not only can they severely damage and disfigure plants, but they can also outright kill them if left untreated. To get rid of thrips, you have to be very persistent. If your plants have random yellow patches, little black dots (they like to leave behind their poo), and stunted new growth, it’s probably time to look for thrips.
Quickly remove and quarantine any infested plants; thrips can spread fast. Thrips are hard to see, and the larvae they leave behind are near impossible to spot, so you will likely notice the damage before you spot the bug. Attracted to the color blue, blue sticky traps can often work for controlling adult thrips. A thorough and regular treatment of insecticidal soap or neem oil is vital. Make sure to soak both the front and the back of all of the leaves.
I am currently in an ongoing battle with thrips (I’m finally winning!), and what’s worked best for me is the Bonide Systemic Granules. You simply sprinkle them on the tops of your plant and water regularly—this a great way to control infestations of pests that like to burrow and lay eggs in your soil. If you can’t find anything that works, using an insecticide might be your only way to go. I recommend Captain Jacks Dead Bug Brew.
How to Prevent Pests
Now that we’ve gone over the most common houseplant pests let’s introduce some regular maintenance that you can do to prevent any outbreaks.
Whenever you bring a new plant into your home, it’s tempting to put it on display right away. But it’s so important always to check any new plants. Most pests enter your home by hitching a ride, so it’s best to catch them at their source.
When you have an extensive plant collection, it’s essential to be vigilant and inspect the foliage. I like to dedicate one day a week to check all of the plants in my house for pests. It sounds annoying, but finding an infestation too late is much more painful, trust me!
It’s crucial to quarantine any infested plants. Certain bugs can spread fast, so separating them from the rest of your collection is vital.
Keep your leaves clean. A regular treatment of a damp cloth or neem oil on your foliage will do wonders in the long run. Bugs will be less likely to damage plants that are regularly treated with natural preventatives.
Now that you know the most common household pests and how to prevent them, you will be able to handle any infestation that comes your way. Many of these pest infestations seem overwhelming and unbeatable when they are happening, but don’t worry. We’ve all been there, and you can get through this with some willpower and elbow grease.
I thought it would be fun to put together a list of 10 Trending Philodendrons. It certainly isn’t an all-encompassing list of all of the Philodendrons that are trending in the houseplant world, but it is a good place to start! Here is a list of 10 Philodendrons that I absolutely adore, as well as some care tips for them.
@abitofhomelove
Pink Princess
We might as well start with a fan favorite, the Pink Princess. This plant has taken the plant world by storm, and people are still hunting for the best specimen. Naturally, the appeal of this plant is its pink variegation. But finding one with a lot of variegation can be tricky. Keeping one healthy with a lot of pink variegation can be even trickier.
An Instagram sensation, the Pink Princess Philodendron is one of the most trending plants today. They thrive in bright indirect light and require stable humidity. Letting them dry out between waterings is key, and the pink can often burn with too much direct sunlight.
@variegated_velvet
2. Gigas
One of my favorite philodendrons, the Philodendron Gigas gets better and better with age. I mean, who doesn’t love big velvety leaves? As a small plant, these guys have elongated oval-shaped leaves. As they grow more mature, these leave can get as big as 4 feet long and 4 feet wide! (Don’t worry; you don’t have to let yours get that big unless you want to.)
These plants are so easy going and can even thrive in moderate to low lighting. Much like other philodendrons, they like to dry out between waterings. The new foliage comes out in a coppery color that is so exciting to watch. When given a chance to climb, these plants will absolutely soar.
@indri_chan
3. Melanochrysum
The mother of heart-shaped leaves, the Melanochrysum is a stunner of a plant. Like the gigas, mature specimens can grow extremely long, and they are just breathtaking. With their big velvety leaves, it’s hard not to love this plant.
Generally, the Melanochrysum is relatively easygoing. It can do well in bright to moderate light and thrives with a moss pole or totem’s support. Like most Philodendrons on this list, letting the top few inches of soil dry out before watering is always important.
@growrootsgrow
4.Gloriosum
There’s something so lovely and straightforward about the Philodendron Gloriosum. With large and pillowy heart-shaped leaves, it’s hard not to fall in love with them. With bright white veins, the Gloriosum stands out from the rest.
Relatively easy-going, the Gloriosum is a crawler, which means it won’t be going up any moss pole. But that doesn’t make it any less beautiful!
@craigmilran
5. Glorious (Melanochrysum x Gloriosum)
Just when you thought Philodendrons couldn’t get any better, along come the hybrids. The Philodendron Glorious is precisely that; glorious. It might very well be the mother of all velvety heart-shaped leaves.
Taking the best attributes from the Melanochrysum and the Gloriosum, the Glorious likes to climb or crawl, making it quite a variable plant. It is easily one of the most beautiful Philodendron hybrids.
6. El Choco Red
An undescribed Philodendron species from Ecuador, the El Choco Red is quite a beauty. Although there is a whole naming debate surrounding this plant, it is a gorgeous collectors plant. It is closely related to the Philodendron Verrocosum and Philodendron Luxurians.
What makes this plant so unique is the striking red backside of the leaves. That’s not to say that the front isn’t gorgeous too, with its velvety texture and pillowy shape.
@just.a.girl.loving.plants
7. Serpens
Just when you thought Philodendrons couldn’t get any fuzzier, along comes the Serpens. The most characteristic part of this plant is the fuzzy stems or petioles covered with little hairs! That’s right, hairy stems.
But hairy stems aren’t all you get with the Serpens; you also get heart-shaped leaves. The Serpens is a very quirky Philodendron that certainly stands out from the crowd.
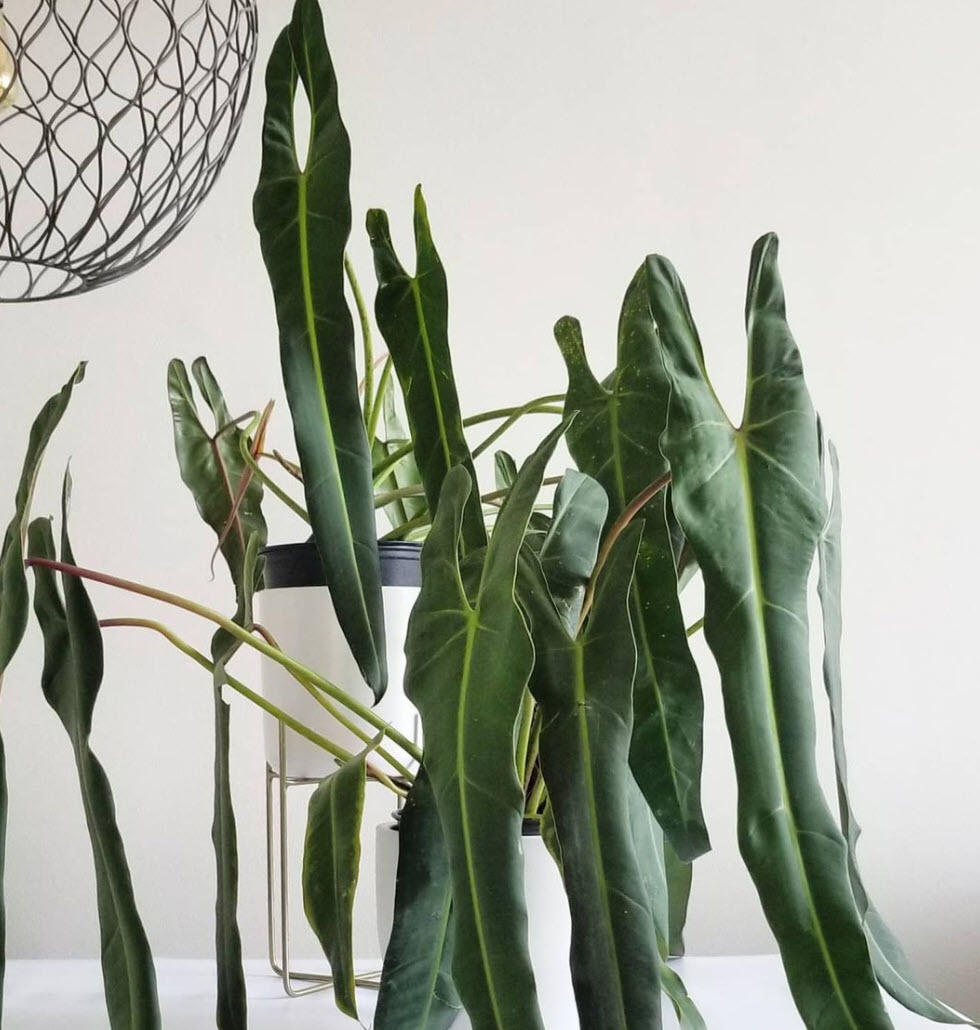
8. Patriciae
If you like long foliage, you have to see the Philodendron Patriciae. These leaves get LONG, and mature specimens are stunning. They are not easy to find, but they make a great showpiece in any collection.
The Patriciae is a plant that loves a moss pole. If given the opportunity to climb, the leaves can double in size! This is one of my favorite plants to grow and is always just a pleasure to watch a new leaf unfurl.
@rxoticplants
9. Joepii
The Philodendron Joepii has such a unique shape that its original discoverer thought it had been half-eaten by bugs! If you are into strange and almost alien-like foliage, then this is the plant for you.
One of the most striking aspects of this plant is its long lobes or “ears.” Extremely rare in collections and even rarer in the wild, this is a must-have collector’s item for the philodendron aficionado.
@atriumbotanicals
10. Spiritus Sancti
Now, this plant is the rarest of the rare. The Philodendron Spiritus Sancti only exists in a handful of collections. They are very rare in the wild and are only found in Brazil in the area of Espirito Santo.
The Spiritus Sancti is the holy grail of Philodendrons. If you can find one for sale, they usually go for thousands of dollars and have recently experienced a dramatic price increase. Recent large specimens have gone for upwards of $12,000!
While this list doesn’t go over every rare Philodendron out there, it does show how beautiful and diverse the species can be. Whether you are just getting into plants or have studied them for years, Philodendrons are an incredible variety to admire and add to your collection.
I am such a sucker for big velvety heart-shaped leaves. I thought it would be fun to go over some of my favorites!
It’s no secret that philodendrons are loved for their strange foliage. So it’s no surprise that heart-shaped leaves are some of the most popular philodendrons in the houseplant world.
Melanochrysum
@youdontevengrowhere
Let’s start with the mother of heart-shaped leaves, the Melanochrysum. The philodendron melanochrysum is a stunner of a plant. Mature specimens can grow extraordinarily long and develop breathtaking velvety foliage.
Generally, the Melanochrysum is relatively easygoing. It can do well in bright to moderate light and thrives with a moss pole or totem’s support. Like most Philodendrons, it’s important to let the top few inches of soil dry out before watering. I always stick my finger in my plants’ soil; it really is the best way to tell whether it needs watering.
Gloriosum
@photosyntherhys
The Philodendron Gloriosum is another big-leafed fan favorite. There’s something so lovely and straightforward about the Philodendron Gloriosum. With large and pillowy heart-shaped leaves, it’s hard not to fall in love with them. Its bright white veins help the Gloriosum stand out from the rest.
Relatively easygoing, the Gloriosum is a crawler, which means it won’t be going up any moss pole. But that doesn’t make it any less beautiful!
Glorious (Melanochrysum x Gloriosum)
@plantsaddictionisreal
Just when you thought Philodendrons couldn’t get any better, along come the hybrids. The Philodendron Glorious is precisely that; glorious. It might very well be my favorite velvety heart-shaped leaf.
Taking the best attributes from the Melanochrysum and the Gloriosum, the Glorious likes to climb or crawl, making it quite a variable plant. It is easily one of the most beautiful Philodendron hybrids.
Verrucosum
@nextdoorjungle
Not only does the Philodendron Verrosum have some beautiful velevety heart-shaped leaves, it also features a fuzzy petiole! Some people may not be fans of fuzzy or hairy stems, but I think it is just adorable. Verrocosum’s are a bit more sensitive than other philodendrons on this list. From my experience, they do not enjoy being shipped very much, and require a higher humidity.
Melanochrysum x Verrucosum
Probably my favorite hybrid, the Philodendron Melanochrysum x Verrucosum is such an easygoing philodendron that is just a pleasure to grow. Also known as the Philodendron Splendid this hyrbid is such a statement piece in any collection. Mine thrives with little interference, attaching itself to its pole and shooting out a new leaf almost every week. The foliage features the beauty of a verrucosum without the added fragility.
Luxurians
@raul_tropic
Philodendron Luxurians are just that, luxurious. Their velvety leaves almost shine in the right lighting. With thick contrasting white veins, it’s sure to add a pop to your heart-shaped leaf collection. Luxurians tend to enjoy lower light, as they like to grow across the forest floor.
El Choco Red
@growrootsgrow
An undescribed Philodendron species from Ecuador, the El Choco Red is quite a beauty. Although there is a whole naming debate surrounding this plant, it is a gorgeous collectors plant. It is closely related to the Philodendron Verrocosum and Philodendron Luxurians.
What makes this plant so unique is the striking red backside of the leaves. That’s not to say that the front isn’t gorgeous too, with its velvety texture and pillowy shape.
With spring coming up, I thought it would be nice to post an article about starting your own vegetable garden. I’ve found vegetable gardening and houseplant care to be pretty different in a lot of ways. Veggies need certain things that houseplants just don’t. Harvesting your first season of vegetables, and eating veggies that you grow yourself is beyond rewarding. If you like caring for plants already, starting your own vegetable garden is a great way to expand on the hobby.
So you want to start a vegetable garden? It turns out it’s easier than you think! More often than not, the hardest part about starting a vegetable garden is the starting. Once you make an effort to start, it’s simple to stay on track and have a great harvest. Whether you live in an apartment, home, city, or suburb, there is a vegetable garden that will work for you and your needs. Here’s everything you need to know about how to start a vegetable garden from scratch.
Getting Started
The first thing you need to get started is a garden bed. If you have a yard, you can build this bed directly into the ground and create what is called an “earth bed.” Or you can go the route of a raised garden bed. Raised garden beds are significantly simpler to maintain and are often more aesthetically pleasing. Plus, you can even find pre-built kits online!
If you only have a patio or balcony at your disposal, there are great raised garden kits that are small and compact. These are perfect options for starter gardens! Just make sure that you get enough sunlight. A vegetable garden needs at least 6 hours of direct sunlight.
It’s best to start small. You certainly don’t want to find yourself biting off more than you can chew. Remember that you will have to water this garden, weed it, fertilize it, and get the soil ready. A typical starter vegetable garden is around 4 x 4 feet.
For those that are on the more crafty side, you can always go the route of building the beds yourself out of wood.
Planning our garden last spring. Filling the bed with a mix of bumper crop and top soil
Good Soil
The foundation of every successful garden is good soil. You don’t just use you’re average potting mix when you are growing vegetables in a garden bed. And you also don’t just want to use what is in the ground. Your local hardware store will have a “garden soil” for sale, which is a great introductory product. I highly recommend buying a pre-mixed vegetable garden soil for your first garden, as mixing your own soil can be a bit of science!
So what is the difference between all this soil anyway? Potting soil is for use in containers only and has no soil in it at all. Potting soil is a mixture of peat moss and other organic materials. Garden soil is a mix of topsoil and other natural materials like compost and fertilizer. The significant part about garden soil is that it is mixed for you, but it is more expensive than buying topsoil and mixing the ingredients yourself.
Purchasing pre-mixed vegetable garden soil will be the easiest route. But, if you want to create a soil mix, start with topsoil. Topsoil will be available by the bag at any local nursery or garden store. The ideal ratio is approximately 60% topsoil, 30% compost, and 10% potting soil. Try talking to someone at your local garden store. The great thing about gardeners is that they love to talk about gardens! Take them these proportions, and I’m sure they will point out precisely what you need for your climate.
Weed Control
Once you have your garden bed set up, the first step is to use a weed cloth. If you want a more DIY approach, you can also use recycled cardboard. A weed barrier will keep the grass and weeds beneath your garden bed from growing into your soil. A proper weed barrier is an essential step, and you’ll thank yourself in the long run!
So you’ve got your garden bed assembled, and your weed barrier set in place. Now it’s time to get dirty. Open your bags of garden soil and fill the bed. Filling the garden bed with new soil is one of the most exciting parts of the process. It’s that great feeling of anticipation for things to come.
Fresh peas from our raised beds
What to Plant
Now it’s time to decide what to plant. Try filling your garden with vegetables you like to eat. You’d be surprised how often gardeners plant things they don’t even like using! If you’re big on salads, try growing kale, lettuce, or tomatoes. Love cooking? Plant some onions, garlic, and fresh herbs.
Your local garden center will sell starter plants that you can transplant into your garden. Transplants are by far the most straightforward route of getting things started and established in your garden. Alternatively, you can start from seed.
Make sure to check when it’s safe to plant something in your area. For example, here in New Jersey, I am in zone 7a. That means my area is susceptible to a certain amount of frost and a certain amount of hot weather. Try googling your state’s Plant Hardiness Zone Map to determine when to plant certain vegetables. On average, it’s best to wait to grow tomatoes until May or June, unless you are a more southern state with an earlier last day of frost.
My favorite memories are of picking fresh cucumbers out of my Grandma’s garden, so having fresh cucumbers was a must for me
How to Germinate Seeds
With seeds, like tomatoes, you often want to start them inside. The germination period can be super fun to watch and is a great way to get the kids involved. Home Depot and garden centers will sell seed starter kits. These use a seed pod or pellet used of a dehydrated growing medium. Simply hydrate the pod, add your seed, and watch it grow!
Reusing egg cartons is another excellent way to start germinating seeds. Fill the container with your soil mixture and plant a few seeds in each compartment. If too many grow, you can always cut them back. So it’s best to overprepare. Keep your seeds just out of direct sunlight by a window. A kitchen counter is an attractive option since it lets you keep an eye on it (plus it’s so fun to watch!). Once your seedlings have grown about an inch or two, they will be ready to transplant into your garden. This process usually takes about 1-2 weeks, depending on the type of vegetable.
Radishes from last spring’s harvest
It’s Time to Plant!
And now the magic moment has arrived, the time to start planting things! On your seed packet or a purchased transplant, there will be directions for how to space your crop. On average, it’s best to plant things at least one index finger apart. Keep in mind what you are planting. Vegetables like tomatoes like to grow upwards. So be prepared to make a trellis out of sticks or bamboo, and space them accordingly. Likewise, cucumbers and beans like to sprawl and crawl out. You can save space by training these plants to grow vertically on a trellis.
Some starters waiting to be transplanted
Water, Water, Water
Make sure to give your new plants a proper and thorough watering. It’s essential to wet the root system of the plants thoroughly. But make sure not to create any puddles or oversoaked area! This initial thorough watering will set your garden up for success.
For a beginner, knowing when to water your garden can be tricky. The best rule of thumb is to stick your finger in the soil. The soil should feel lightly damp and certainly not mucky. If the soil feels dry to the touch, it’s time to water your garden. Make sure to pay attention to the weather. If there has been a lot of rain, you can likely skip a watering. But if it has been extra sunny, you’ll probably need to add another watering.
Photo of my vegge garden, my husband and I built the raised beds from cedar
Enjoy!
So you’ve created your raised garden bed, mixed your soil, germinated your seeds, and planted your plants. With the right amount of care and a regular watering schedule, you’ll be enjoying the bounty of your harvest in no time!
Having your vegetable garden is such a rewarding experience. Not only is the act of gardening therapeutic, but it opens your eyes to all of the work that goes into creating food. There is nothing more rewarding than feeding yourself from your garden and enjoying the fruits, or in this case, the vegetables, of your labor.
Today I figured I’d go over how I root my obliqua cuttings! These directions will work for just about any node cutting of monsteras, philodendron, etc. Node cuttings are cuttings of plants that often do not contain any leaves. For example, monstera obliquas send out “runners,” which are large strands of growth with multiple nodes on them. These runners can be cut up and rooted to create new plants.
Choosing the Cutting
First you have to make sure you have a viable cutting! Unfortunately, there are many people out there who sell and trade cuttings without nodes. The node is the part of the plant that will produce new growth. You can’t make a new plant without it!
So before getting scissor happy and cutting up your precious babies, look at where you should cut. And before purchasing that cutting of that plant you just have to have, inspect the cutting. Ask for lots of photos of the cutting as well as the mother plant.
How to Root the Cutting
I like to root my my more sensitive cuttings in sphagnum moss. There are many containers you can use to root your cutting. I personally like to root my cuttings in our 2.25 inch clear nursery pots so I can see any new growth. You can also use plastic sandwich bags or any other plastic container. Sandwich baggies are also a great way to add humidity over your propagation pots.
Old Chinese food containers are an easy way to create a humid propagation environment for node cuttings. Place a layer of moist, not wet, sphagnum on the bottom of the container. You can even add perlite to the moss for a more airy feel.
Place your node cutting ontop of the moss. Close the container, place it under a grow light or in a window, and you are good to go! I like to open these propagation boxes for fresh air about once a day. This lets me take time to check the cutting for any rot or other oddities. It also gives me a moment to check the humidity and dampness inside the container.
For the more advance grower, you can also root directly in a nice chunky potting mix. Some of my obliqua cuttings I just let hang out on top of some potting mix in a humid environment (like inside a terrarium or cloche). Within a few months they will develop roots. With enough patience, you will see new growth emerge! Here is a photo of an obliqua node that I rooted directly into one of our 2.25 inch clear nursery pots with our potting mix.
Be Patient!
This cutting took about 4 months to get to this point. The time it takes to root and develop new growth really depends upon your environment, and what time of year it is.
I kept this cutting in a reptile terrarium purchased from PetSmart that I converted into a grow tank. I rooted this cutting in winter, but I keep my plants in a temperature and humidity controlled room with grow lights.
First the cutting began to root into the substrate. Once it was well established, it pushed out this new leaf growth! Make sure to be patient with your cutting. It’s tempting to check on it and touch it every day but you really need to try not to! Plants want to grow. The more you leave them alone and let them do their thing, the better off they will be.
I hope this inspires you to root your own node cuttings!
If you have any questions or issues with your own plants, feel free to reach out to me on Instagram or email us.
If you’ve been in the hobby for a bit, you’ve probably heard of the Philodendron Spiritus Sancti. The “holy grail” of Aroids, the Spiritus Sancti is only in a handful of collections and is found sparingly in the wild.
The Spiritus Sancti is native to the area of Espirito Santo in Brazil. It is recognized by its characteristically narrow leaves, long stems, and pointy lobes or “ears.” The leaves themselves are pendant shaped and can grow over 30 inches in length!
@umbotaniconoapartamento
The Spiritus is hemiepiphytic, which means that it spends most of its life as an epiphyte. Like most philodendrons, epiphytes grow on other plants, such as trees, and get their nutrients from air and rain. In the wild, epiphytes are found growing up the trunks of trees, so that’s why we use moss totems for their houseplant brethren! A hemiepiphyte’s roots eventually make their way down the tree and into the ground.
Epiphytes growing up the trunk of a tree. Source: Wikipedia
Like other Philodendrons, they enjoy steady and constant humidity and bright indirect light. Many growers even boast how easy they are to grow, unlike, say, the Monstera Obliqua. But they can only be reproduced by stem divisions, so you have to take the risk of cutting and rooting a top cutting. This is often a long and complicated process, ultimately adding to the rarity of the plant. It is possible to pollinate seeds, but finding specimens to breed aren’t easy. There has also been a lot of talk and research about developing tissue cultures of the Spiritus.
So why is the Spiritus Sancti so rare? Well, it’s simply the hardest to find Aroid out there. The plant is endangered in Brazil, which, unfortunately, has led to a lot of poaching. It’s safe to say that more of these plants live in private collections than in their natural habitat. That being said, many people enjoy acquiring the plant as a sort of conservation, letting it develop and thrive safely. Others are in it for the trophy aspect, having something that others can’t have. And others just really love plants. Regardless of why people want it, it’s on everyone’s wish list.
@FantasticGardensHawaii
But at what cost are people acquiring them? It’s hard to talk about the Spiritus Sancti without touching on the inevitable illegal poaching that goes on. People go into their natural habitat and take specimens from the wild. They cultivate them, cut them, and resell them. It’s the dark side of the plant world, and it’s something that many people accept as reality.
For example, how can you know for sure where your specimen came from? There isn’t really a certificate of authenticity that comes with these plants, ensuring they were sourced legally and ethically. But it is a risk people are willing to take to add this plant to their collection.
It’s important to take a moment to note that I am not going to take sides here about the ethics of sourcing plants but rather speak about it from a purely academic standpoint.
@NSETropicals
The price of the Philodendron Spiritus Sancti has recently soared, along with most rare houseplants. What once went for $1.5K is quickly auctioned now for over $13k. Many of these specimens cost more than most people spend on a car.
And although you can’t drive it or live in it, there’s something about the Spiritus that emotionally satisfies collectors. It’s something to cultivate, to admire, to nurture. It’s a rare bit of nature that many people will never get the pleasure of seeing. Ultimately, the Philodendron Spiritus Sancti is an amazing plant that some are lucky to have in their collections.